How to File a Roof Insurance Claim in Virginia: Step-by-Step Guide
How to File a Roof Insurance Claim in Virginia: Step-by-Step Guide
Key Takeaways
- Filing a roof insurance claim in Virginia promptly after damage is discovered increases the likelihood of full coverage — most policies require timely reporting
- Document all damage with photos and video before making any temporary repairs, and keep receipts for any emergency expenses
- Having your roofing contractor present during the adjuster's inspection is the single most impactful thing you can do to ensure all damage is identified and included in the claim
- If the initial insurance assessment doesn't cover the full scope of repairs, a supplement can be filed with additional documentation — supplements are a normal part of the claims process
- Never sign an Assignment of Benefits (AOB) document — it transfers your rights to the contractor and limits your control over the claim
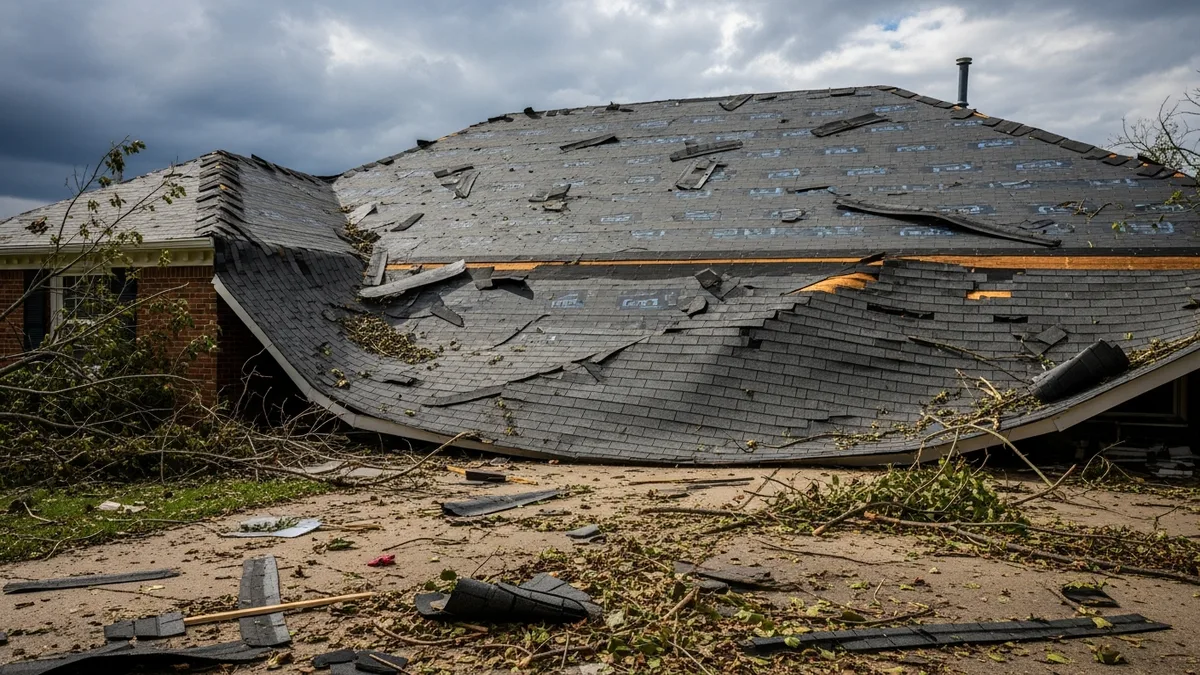
A storm hits your Woodbridge home and you find missing shingles, a ceiling stain, or debris scattered across your yard. Now what? Filing a roof insurance claim correctly from the start determines whether you receive fair compensation for the damage or end up fighting with your insurance company over an inadequate settlement. The process isn't complicated, but it has specific steps that need to happen in a specific order, and missing any of them can reduce your payout or delay your claim.
This guide walks Virginia homeowners through the complete insurance claim process for roof damage — from the moment you discover damage through final payment and repair completion.
Step 1: Document Everything Immediately
Before you touch anything, document the damage. Your smartphone is your most important tool at this stage. Take wide-angle photos showing the overall damage context, close-up photos of specific damage (missing shingles, dents, debris impacts, exposed underlayment), interior photos of any water stains, drips, or damage to ceilings and walls, video walkthrough of the exterior showing all affected areas, and photos of any debris in the yard (tree branches, neighbor's shingles, etc.).
Note the date and approximate time the damage occurred. If the damage was caused by a specific storm event, record the date — this ties your damage to a documented weather event, which strengthens your claim. Many adjusters verify weather reports for the claimed damage date.
Step 2: Mitigate Further Damage
Your insurance policy requires you to take reasonable steps to prevent additional damage. This is not optional — failing to mitigate can give the insurance company grounds to deny coverage for damage that could have been prevented. Reasonable mitigation includes covering exposed roof areas with a tarp, placing buckets under active leaks, moving belongings away from water intrusion, and drying affected areas. Keep receipts for any emergency expenses (tarps, buckets, water extraction) — these are typically reimbursable under your claim.
Step 3: Contact Your Insurance Company
File your claim within 24 to 48 hours of discovering the damage. When you call, have your policy number ready, the date the damage occurred, a general description of the damage, and your contact information for the adjuster to schedule an inspection. The insurance company will assign a claim number and schedule an adjuster to inspect the property, usually within 5 to 14 days depending on the volume of claims in the area (major storm events create backlogs).
Step 4: Contact a Local Roofing Contractor
Before the adjuster arrives, have a local roofing contractor inspect your roof and prepare a detailed damage assessment. Choose a contractor who regularly handles insurance claims, is licensed in Virginia, and has local references. The contractor's assessment serves two purposes: it gives you an independent evaluation of the damage scope to compare against the adjuster's findings, and the contractor can be present during the adjuster's inspection to ensure all damage is identified.
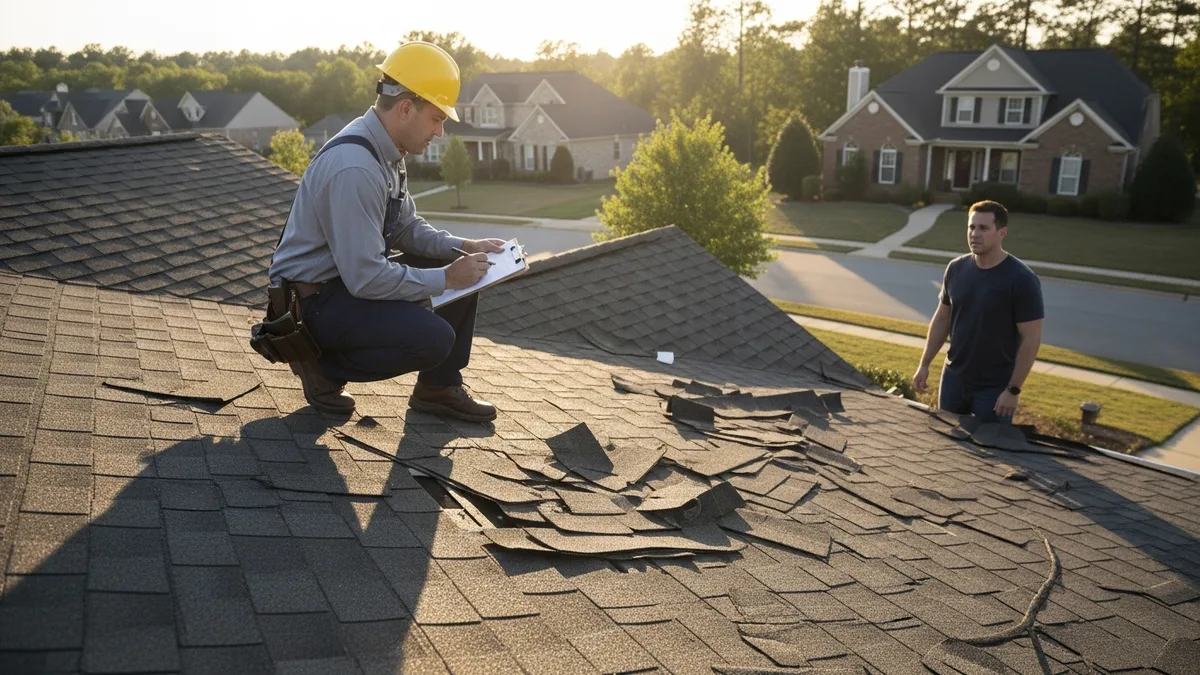
Step 5: The Adjuster's Inspection
The adjuster represents the insurance company's interest. They are trained professionals, but their job is to assess damage per the policy terms — not to advocate for the maximum payout. Having your contractor present during the inspection is the most impactful step you can take because your contractor identifies damage the adjuster might miss (bruised shingles, compromised underlayment, displaced flashing seals that aren't visible from the ground), provides technical context for the damage (explaining why a specific failure pattern indicates storm damage versus normal aging), and ensures the scope document includes all affected components (ridge cap, starter strip, pipe boots, flashing — not just the visibly missing shingles). You are entitled to be present during the inspection and to have a contractor present. Schedule the adjuster's visit when your contractor is available.
Step 6: Review the Insurance Assessment
After the inspection, the insurance company provides a scope of loss document and a settlement offer. Review this carefully with your contractor. Common items that are underestimated or missed in initial assessments include overhead and profit (O&P) for the contractor, code upgrade requirements (current code may require work that wasn't originally installed — like ice-and-water shield or upgraded ventilation), haul-away and dump fees at current local rates, flashing replacement versus re-use, starter strip and ridge cap replacement, and drip edge replacement.
Step 7: File a Supplement If Needed
If the initial assessment doesn't cover the full scope of necessary repairs, your contractor can file a supplement — additional documentation requesting coverage for items that were missed or undervalued. Supplements are a normal, accepted part of the claims process. They typically include photo documentation of the additional damage, manufacturer specifications requiring specific installation methods, current local pricing for materials and labor, and code requirements that affect the scope. Most supplements are resolved within two to four weeks through negotiation between the contractor and the adjuster.
Understanding Your Deductible
Your deductible is the amount you pay out of pocket before insurance coverage begins. Most Virginia homeowner policies have a standard deductible of $1,000 to $2,500 for wind and storm damage claims. Some policies have a separate wind/hail deductible that is percentage-based (typically 1 to 5 percent of the dwelling coverage amount). On a home insured for $400,000, a 2 percent wind deductible means $8,000 out of pocket. Review your policy declarations page to understand which deductible applies to roof damage claims.
Timeline for Roof Insurance Claims in Virginia
Understanding the typical timeline helps set expectations and ensures you stay on track throughout the process:
| Phase | Timeline | Action |
|---|---|---|
| Damage discovery | Day 1 | Document, mitigate, photograph |
| File claim | Days 1-2 | Contact insurance company |
| Contractor inspection | Days 2-5 | Independent damage assessment |
| Adjuster inspection | Days 5-14 | Insurance company assessment |
| Settlement offer | Days 14-30 | Review with contractor |
| Supplement (if needed) | Days 30-60 | Additional documentation and negotiation |
Red Flags to Avoid
Red Flags to Avoid
- Assignment of Benefits (AOB): Never sign an AOB. This document transfers your insurance claim rights to the contractor, giving them control over the settlement negotiation and payment. This limits your ability to challenge the scope or choose a different contractor if you're unsatisfied
- "We'll cover your deductible": A contractor who offers to waive your deductible is engaging in insurance fraud. This practice is illegal in Virginia and is a major red flag about the contractor's business practices
- Pressure to sign immediately: Legitimate contractors don't pressure you to sign a contract before the adjuster has inspected. Storm-chasing contractors use urgency tactics to lock you in before you can evaluate other options
- Full payment before work begins: On insurance claims, contractors should be paid from insurance proceeds after work is completed, not upfront. A small deposit (10 to 20 percent) for material ordering is reasonable; full payment before work begins is not
Depreciation and Recoverable vs Non-Recoverable Costs
Most Virginia homeowner policies are either Replacement Cost Value (RCV) or Actual Cash Value (ACV), and the distinction directly affects how much you receive. An RCV policy pays the full cost to replace the damaged roof with equivalent new materials and labor. However, the initial payment typically includes depreciation — a deduction based on the age and condition of the existing roof. The depreciated amount is held back and paid as a second check after the work is completed and the contractor submits a completion certificate and final invoice. This is standard practice and not a shortchange — the insurance company releases the held-back depreciation once they confirm the repairs were actually performed.
An ACV policy, by contrast, only pays the depreciated value of the roof and does not release additional funds upon completion. If your roof is 18 years into a 25-year shingle lifespan, an ACV policy pays significantly less than the actual replacement cost. Homeowners with ACV policies often face a substantial out-of-pocket expense beyond the deductible. Before filing a claim, review your declarations page to confirm whether your policy provides RCV or ACV coverage for the roof. Some carriers have shifted to ACV-only coverage for roofs older than a certain age — typically 15 or 20 years — even if the rest of the policy is RCV.
Choosing the Right Contractor for Insurance Work
Not every roofing contractor handles insurance claims effectively. The claims process requires specific skills beyond roofing installation: detailed damage documentation that matches Xactimate line items, the ability to write and negotiate supplements, knowledge of current local pricing that may differ from the insurance company's database, and familiarity with code upgrade requirements that increase the scope beyond the original damaged installation. A contractor who primarily handles cash-pay jobs may leave money on the table during the claims process simply because they lack experience with the documentation and negotiation steps.
When evaluating contractors for insurance claim work in Northern Virginia, ask how many insurance claims they have handled in the past 12 months, whether they write their own supplements or outsource this to a third party, and whether they are willing to meet the adjuster on-site during the inspection. A contractor who regularly works with insurance companies in the Prince William County and Fairfax County markets understands the local adjusters, the common points of negotiation, and the documentation standards that produce fair settlements. This experience translates directly into a better outcome for the homeowner.
Conclusion
Filing a roof insurance claim in Virginia is a process that rewards preparation, documentation, and having the right contractor on your side. Document damage immediately, mitigate further loss, file promptly, and ensure your contractor is present during the adjuster's inspection. If the initial assessment falls short, supplements are a normal and effective tool for ensuring full coverage. Avoid storm chasers, AOB agreements, and contractors who offer to waive your deductible.
Call us at (571) 570-7930 or book a consultation for storm damage assessment and insurance claim assistance in Northern Virginia.